
🚀 Declarative Jenkins Pipeline Using Docker
In this blog post, I'll guide you through setting up a declarative Jenkins pipeline to automate the build, testing, and deployment of a Dockerized Node.js application. You'll learn how to configure Jenkins to trigger builds via GitHub webhooks, push Docker images to Docker Hub, and deploy the application on an AWS EC2 instance. This project demonstrates a complete CI/CD workflow using Jenkins and Docker. Let's dive in! 🌊
🎯 Objective
Our goal is to create a Jenkins pipeline that:
🐳 Builds a Docker image from a Dockerfile in a GitHub repository.
✅ Runs tests on the Docker image.
📦 Pushes the image to Docker Hub.
🚀 Deploys the Docker image to an EC2 instance.
📋 Prerequisites
Before starting, make sure you have the following tools, accounts, and configurations set up:
Java, Jenkins, and Docker installed: These should be running on either an Ubuntu EC2 instance (if you're using AWS) or a local machine.
A GitHub account: You will need a GitHub repository set up to store your project code and use webhooks to automate the CI/CD process.
Docker Hub account: Ensure you have a Docker Hub account to push and store Docker images.
🔌 Plugins on Jenkins
Ensure you have the following Jenkins plugins installed:
Git Plugin: For pulling code from the GitHub repository.
Docker Pipeline Plugin: To build and push Docker images.
GitHub Integration Plugin: For managing webhooks and interactions with your GitHub repository.
SSH Agent Plugin: For securely managing SSH credentials when deploying to remote servers.
🔑 Credentials Configured on Jenkins
Before using these environment variables on Jenkins Pipeline, ensure that the necessary credentials are configured in Jenkins:
Docker Hub Credentials (
dockerhub-credential)GitHub Credentials (
github-credential)EC2 SSH Key Credentials (
ec2-sshkey)
Here’s how to add them in Jenkins:
Docker Hub Credentials (dockerhub-credential)
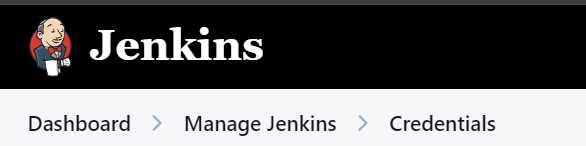
- Navigate to Jenkins Dashboard > Manage Jenkins > Manage Credentials.
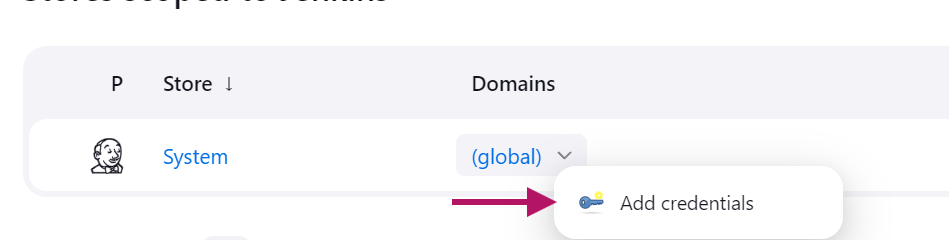
Click on (global) under the "Stores scoped to Jenkins" section.
Click Add Credentials (on the left side).
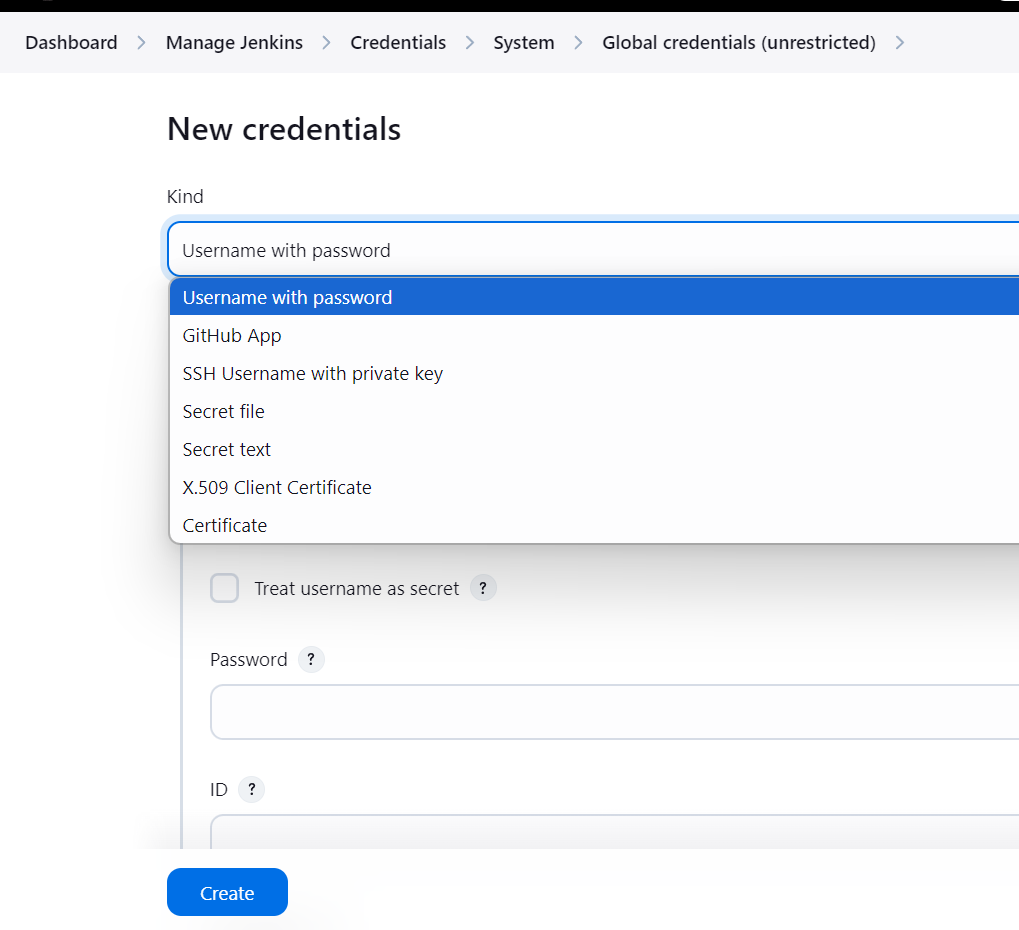
For Kind, select Username with password.
In Username, enter your Docker Hub username (your Docker Hub username).
In Password, enter your Docker Hub password.
Set ID to
dockerhub-credential.Click OK.
GitHub Credentials (github-credential)
Follow the same steps as above, but:
For Username, enter your GitHub username (your GitHub username).
Set ID to
github-credential.
EC2 SSH Key Credentials (ec2-sshkey)
Navigate to Manage Credentials in Jenkins as described above.
Click Add Credentials.
For Kind, select SSH Username with private key.
Set Username to
ubuntu.For Private Key, select Enter directly and paste your EC2 SSH private key (the .pem file contents).
Set ID to
ec2-sshkey.Click OK.
🔑How These Credentials Work:
In your Jenkinsfile, these credentials are accessed through the environment block:
DOCKER_CREDENTIALS_ID: Used for pushing Docker images to Docker Hub.EC2_KEY: Used to SSH into your EC2 instance during deployment.
These credentials are securely stored in Jenkins and referenced using their respective IDs in the pipeline. If they are not added correctly, the pipeline will fail because Jenkins won't be able to authenticate with Docker Hub or your EC2 instance.
This ensures that sensitive information like your Docker Hub password and EC2 SSH key is not hardcoded into your pipeline, but managed securely by Jenkins.
environment {
    DOCKER_CREDENTIALS_ID = 'dockerhub-credential'
    DOCKER_REGISTRY_URL = 'https://index.docker.io/v1/'
    EC2_KEY = credentials('ec2-sshkey')
    EC2_HOST = '54.173.65.249'
}
🗂️ Tree Structure of Directory
Here's how your project directory should look:
goCopy codeJenkins-Declarative-Pipeline-Using-Docker-GitHub-and-Jenkins/
├── Dockerfile
├── Jenkinsfile
├── app.js
├── package.json
├── test.js
└── .dockerignore
📄 Files for this project
What is a Dockerfile?
A Dockerfile is a script containing a set of instructions to build a Docker image. It defines the base image to use, the dependencies required, and the steps needed to set up and run an application in a containerized environment.
Dockerfile for Our Application
dockerfileCopy code# Use the official Node.js image as a base
FROM node:14

# Set the working directory
WORKDIR /usr/src/app

# Copy package.json and package-lock.json
COPY package*.json ./

# Install dependencies
RUN npm install

# Copy the rest of the application code
COPY . .

# Install Mocha globally (if necessary)
RUN npm install -g mocha

# Set permissions (if necessary)
RUN chown -R node:node /usr/src/app

# Switch to a non-root user
USER node

# Expose the port the app runs on
EXPOSE 3000

# Start the application
CMD ["npm", "start"]
🔗 How the Jenkinsfile and Dockerfile Work Together
Stage: Build Docker Image
In this stage, Jenkins builds a Docker image using the instructions from the Dockerfile.
docker.build('sandhyadev836/my-nodejs-webapp:test')
This command tells Jenkins to use the Dockerfile to package everything (Node.js runtime, application code, and dependencies) into a single image.
Dockerfile Connection:
The Dockerfile starts with a Node.js base image and installs the required dependencies using
npm install.It sets up the environment for the application, manages permissions, and exposes port 3000 where the app will run.
Stage: Run Tests
Here, Jenkins runs the tests inside the Docker image created in the previous stage.
docker.image('sandhyadev836/my-nodejs-webapp:test').inside {
    sh 'npm test --verbose'
}
Running tests inside the Docker image ensures consistency between the test environment and production.
Dockerfile Connection:
The
npm testcommand runs using the test framework (e.g., Mocha) installed earlier in the Dockerfile viaRUN npm install.This ensures that the same dependencies are used during testing as they will be in production.
📝 Understanding the Jenkinsfile
A Jenkinsfile is a text file that describes the steps needed to build, test, and deploy your application using Jenkins. It lays out the tasks in a sequence, making it easy to follow and share with others.
Key Points:
Automated Process: The Jenkinsfile automates the workflow, so you don’t have to do everything manually.
Stages: It defines different stages like building the code, running tests, and deploying the application, ensuring everything runs smoothly.
Easy to Share: Because it’s just a text file, you can keep it in your code repository, making it easy to track changes and collaborate with others.
In this Jenkinsfile, we are automating the steps involved in:
Checking out the code from GitHub.
Building a Docker image from your code.
Running tests to ensure the code works as expected.
Pushing the Docker image to Docker Hub.
Deploying the Docker container on an EC2 instance.
📋 Pipeline Definition
pipeline {
    agent any
The agent any tells Jenkins to run this pipeline on any available machine (agent) that can handle it. It’s like saying, "I’m ready to run this pipeline on any computer that's available."
Environment Variables
In your Jenkins pipeline, you need environment variables to handle sensitive information like credentials for Docker Hub and SSH keys for EC2 instances.
environment {
        DOCKER_CREDENTIALS_ID = 'dockerhub-credential'
        DOCKER_REGISTRY_URL = 'https://index.docker.io/v1/'
        EC2_KEY = credentials('ec2-sshkey')
        EC2_HOST = '54.173.65.249'
    }
These variables store information such as Docker credentials, EC2 SSH keys, and your Docker registry URL, which are required for different stages of the pipeline.
📋 Pipeline Stages
In Jenkins pipelines, stages are distinct steps in the CI/CD process, and each stage performs a specific function.
Checkout
stage('Checkout') {
        steps {
            git branch: 'main', url: 'https://github.com/Sandhyagito/Jenkins-Declarative-Pipeline-Using-Docker-GitHub-and-Jenkins.git'
        }
    }
This stage retrieves the latest version of the code from the GitHub repository. It ensures that Jenkins is working with the most up-to-date code so Jenkins can work with the latest version.
Build Docker Image
stage('Build Docker Image') {
        steps {
            script {
                docker.build('sandhyadev836/my-nodejs-webapp:test')
            }
        }
    }
In this stage, Jenkins builds a Docker image from your application code. A Docker image is a lightweight, standalone, and executable package that includes everything needed to run the application. By building the image, you're packaging your app with its environment, making it portable and consistent across different systems.
Run Tests
stage('Run Tests') {
        steps {
            script {
                docker.image('sandhyadev836/my-nodejs-webapp:test').inside {
                    sh 'npm test --verbose'
                }
            }
        }
    }
In this stage, tests are run inside the Docker image, which is like running them in the same environment where your application will be deployed. This helps catch any potential issues early, before the app is sent to production. The npm test command runs any unit tests defined in your project to ensure that the code works as expected.
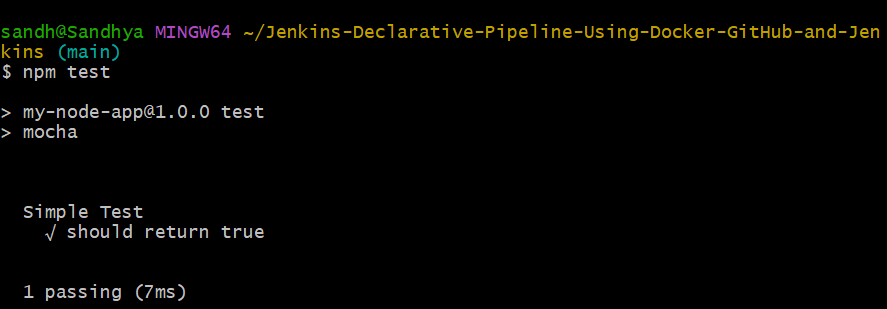
In addition to automated tests triggered by the CI/CD pipeline, I also ran manual tests using the command "npm test" in Git Bash. This step allows for immediate feedback on any changes made in the codebase, ensuring that the application functions correctly before pushing changes to the remote repository.
Push to Docker Hub
stage('Push to Docker Hub') {
        steps {
            script {
                docker.withRegistry(DOCKER_REGISTRY_URL, DOCKER_CREDENTIALS_ID) {
                    docker.image('sandhyadev836/my-nodejs-webapp:test').push('test')
                }
            }
        }
    }
Once the tests pass, this stage pushes the Docker image to Docker Hub, a public or private repository for storing and sharing container images. This makes your Docker image accessible from anywhere, including production servers. Here, the image is tagged with 'test' to distinguish it from other versions.
Deploy to EC2
stage('Deploy to EC2') {
        steps {
            script {
                sshagent(['ec2-sshkey']) {
                    sh '''
                    ssh -o StrictHostKeyChecking=no ubuntu@${EC2_HOST} "
                        docker stop webapp-ct || true
                        docker rm webapp-ct || true
                        docker rmi sandhyadev836/my-nodejs-webapp:test || true
                        docker pull sandhyadev836/my-nodejs-webapp:test
                        docker run -d --name webapp-ct -p 80:3000 sandhyadev836/my-nodejs-webapp:test
                        docker ps
                    "
                    '''
                }
            }
        }
    }
This stage handles deployment to an EC2 instance (a virtual server hosted on AWS). It connects to the EC2 instance via SSH, stops any running containers, removes old images, pulls the latest Docker image from Docker Hub, and runs a new container. Mapping EC2's port 80 to the container's port 3000 ensures that the web app is accessible via HTTP
6. Clean Workspace
post {
        always {
            cleanWs()
        }
    }
Once the pipeline completes (whether successful or not), this step cleans up the workspace by removing any temporary files created during the build. This ensures that future builds start with a clean environment, reducing the chance of leftover files causing conflicts.
📄app.js
app.js is the main script for your Node.js server. When someone visits your site, this file handles their requests and sends responses. In app.js, you set up a simple web server using Express. The server listens on port 3000 and responds with "Hello, Jenkins and Docker!" at the root URL.
javascriptCopy codeconst express = require('express');
const app = express();
const port = 3000;

app.get('/', (req, res) => {
  res.send('Hello, Jenkins and Docker!');
});

app.listen(port, () => {
  console.log(`App running on http://localhost:${port}`);
});
📦 package.json
This file manages your project's details and dependencies. It includes scripts to start your app and run tests. It ensures all necessary libraries are installed.
jsonCopy code{
  "name": "my-node-app",
  "version": "1.0.0",
  "description": "A simple Node.js application",
  "main": "app.js",
  "scripts": {
    "start": "node app.js",
    "test": "mocha"
  },
  "author": "Your Name",
  "license": "ISC",
  "dependencies": {
    "express": "^4.17.1"
  },
  "devDependencies": {
    "mocha": "^9.1.3"
  }
}
🧪 test.js
This file contains tests for your application. test.js includes a simple test that checks if true equals true, just to demonstrate how tests are written and run.
const assert = require('assert');
describe('Simple Test', () => {
    it('should return true', () => {
        assert.equal(true, true);
    });
});
🐳 .dockerignore
node_modules
npm-debug.log
The .dockerignore file specifies files and directories that should be ignored by Docker when building your images, helping to keep your images lightweight.
🛠️ Git Commands
1. Setting Up the GitHub Repository:
Create a new repository on GitHub.
Clone the repository locally
git clone https://github.com/YourUsername/YourRepo.git
cd YourRepo
touch Dockerfile Jenkinsfile app.js package.json test.js
//once adding the content into the files, push it to github repo
git add .
git commit -m"Adding Dockerfile Jenkinsfile app.js package.json test.js"
git push origin main

📝 Tasks with Step-by-Step Instructions
Set Up Jenkins Pipeline:
Create a New Pipeline Job in Jenkins:
Open your Jenkins dashboard.
Click on "New Item".
Enter the job name (e.g., "Docker Jenkins Pipeline").
Select "Pipeline" as the project type and click "OK".
Under "Build Triggers":
Scroll down to the "Build Triggers" section.
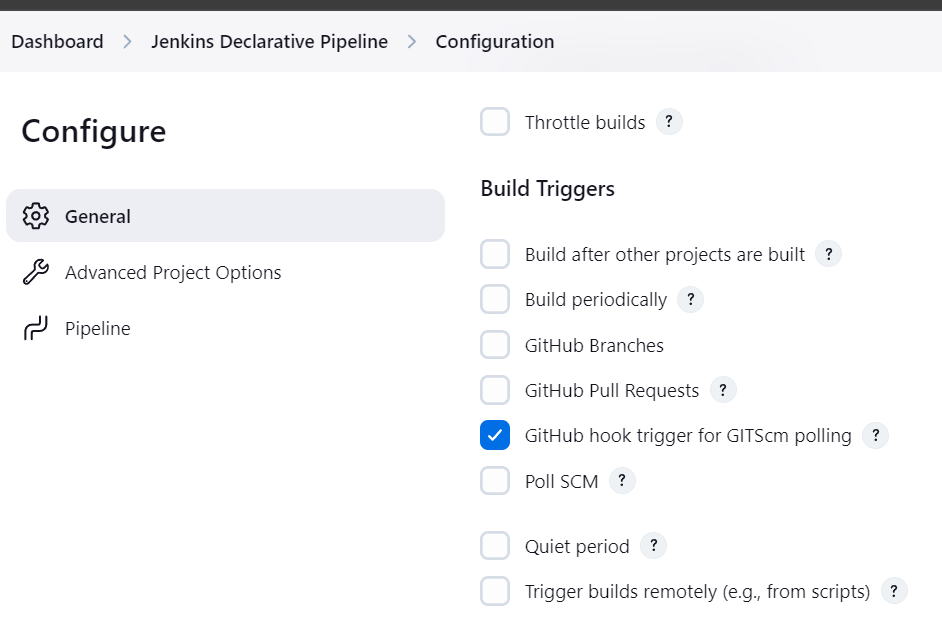
Check the box for "GitHub hook trigger for GITScm polling". This ensures the pipeline triggers automatically when you push code to your GitHub repository.
Write the Pipeline Script:
- In the "Pipeline" section, select "Pipeline script" and paste the following script( Jenkinsfile)
Save the Pipeline:
- Click "Save" to store your pipeline configuration.
Configure Docker and GitHub Credentials:
Add your Docker Hub credentials in Jenkins.
Add your EC2 SSH key in Jenkins.
🚀 Run the Pipeline:
Option 1: 🔍 Manually Trigger the Pipeline from Jenkins
Navigate to Your Pipeline Job:
- Click on the name of your Pipeline job (e.g., "Docker Jenkins Pipeline").
Click on "Build Now" to Trigger the Pipeline Manually:
- On the left-hand side of the job page, click "Build Now." This will manually trigger the pipeline and start the build process.
Verify Deployment:
Check the EC2 instance to ensure the container is running.
Visit http://<EC2_PUBLIC_IP> to see the deployed application.
🌐 Steps to Add the Webhook in GitHub:
Go to Your GitHub Repository:
- Navigate to your GitHub repository.
Navigate to Settings:
- Click on the "Settings" tab in the repository.
Click on Webhooks in the Sidebar:
- From the left sidebar, select "Webhooks."
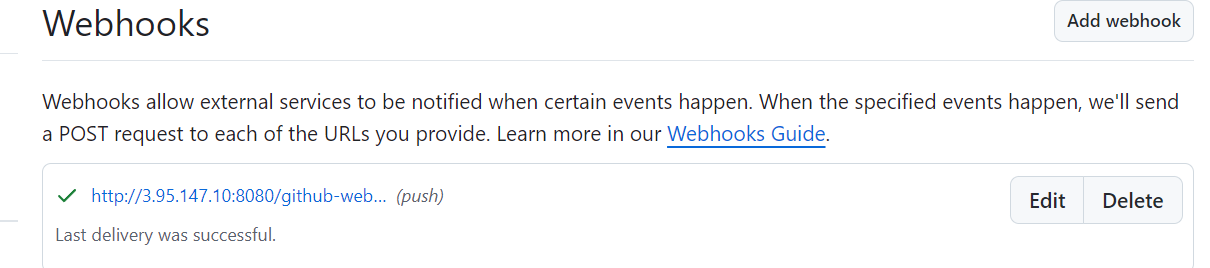
Click on the Add Webhook Button:
- Click on the "Add webhook" button.
In the Payload URL Field, Enter:
http://<your-jenkins-url>/github-webhook/
Set Content Type to Application/JSON:
- Change the "Content type" to
application/json.
- Change the "Content type" to
Choose the Events You Want to Trigger the Webhook:
- Typically, select "Just the push event" or "Let me select individual events" to choose specific ones.
Click the Add Webhook Button to Save It:
- Click on the "Add webhook" button to save your changes.
Option 2: 🌐 Trigger the Pipeline via GitHub Webhook/Testing the Automation
Check "GitHub Hook Trigger for GITScm Polling":
- Ensure that the "GitHub hook trigger for GITScm polling" option is enabled under Build Triggers in your Jenkins job configuration.
- Navigate to Your Project Repository on Git Bash and Push a New Commit:
cd /path/to/your/project
echo "Triggering webhook" >> README.md
git add README.md
git commit -m "Test webhook"
git push origin main
- Observe Jenkins:
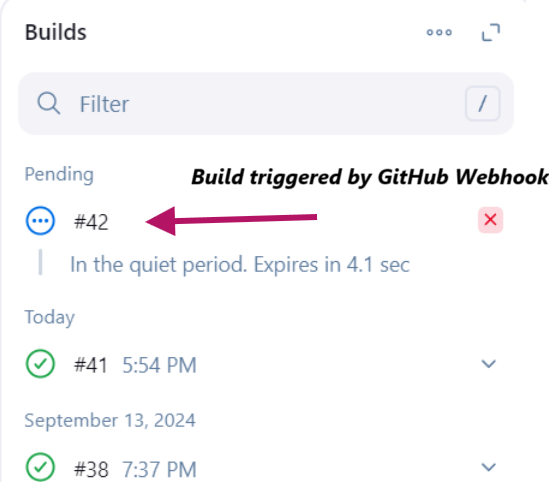
You should see a build triggered automatically on the Jenkins pipeline.
Alternatively, go back to the GitHub Webhook settings, and you’ll see a "Recent Deliveries" section where you can manually “Redeliver” the latest payload to see if Jenkins picks it up.
- Monitor Jenkins:
Check your Jenkins job to see if the build is triggered automatically after the push.
You can monitor the Jenkins job logs to see if they receive the webhook event.
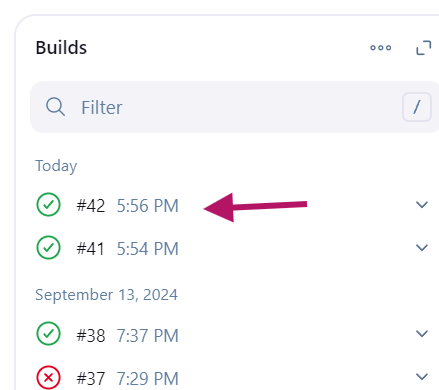
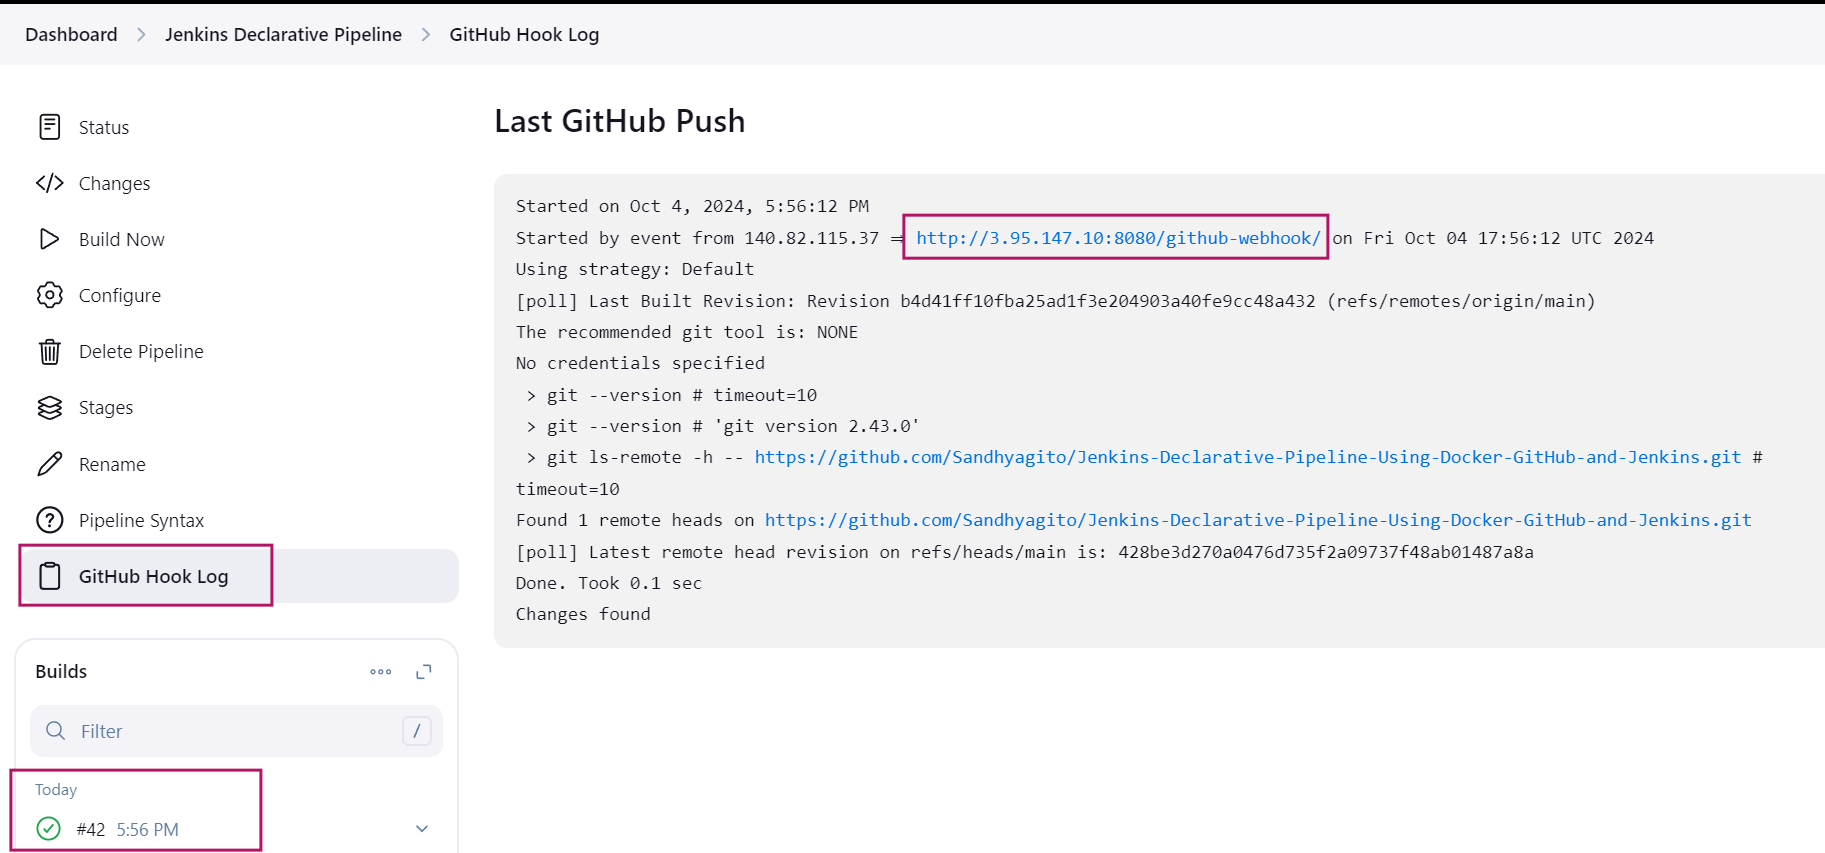
✅ What I Achieved
Automated CI/CD Pipeline: Successfully set up a Jenkins pipeline that builds, tests, and deploys a Dockerized Node.js application.
Integration with Docker and GitHub: Seamlessly integrated Docker and GitHub with Jenkins for automated deployments.
Deployment on EC2: Deployed the Docker container to an EC2 instance and confirmed the application was running successfully.
🎉 Conclusion
The Declarative Jenkins Pipeline Using Docker project successfully demonstrates a robust CI/CD workflow that automates the build, test, and deployment processes for a Node.js application. By integrating Jenkins with Docker and GitHub, this pipeline ensures that any code changes are automatically:
🔨 Built: Each push to the repository triggers a seamless build process, ensuring that the latest code is always ready for deployment.
✅ Tested: Automated tests run during the pipeline execution, guaranteeing that only quality code reaches production and minimizing the risk of introducing bugs.
🚀 Deployed: Successful builds are efficiently deployed to the EC2 instance, providing instant accessibility to the latest application version.
This automated workflow enhances the overall development process by reducing manual intervention, increasing deployment frequency, and ensuring consistent delivery of high-quality software.
Future Considerations
As the project evolves, further enhancements could include:
🔍 Monitoring: Implementing application performance monitoring to track user interactions and identify issues in real time.
🔄 Feedback Loops: Creating mechanisms for feedback from users, allowing for iterative improvements based on actual usage.
🔒 Security: Incorporating security scans within the pipeline to ensure that vulnerabilities are addressed early in the development process.
By adopting this pipeline, teams can significantly improve collaboration, accelerate release cycles, and maintain a competitive edge in the ever-evolving landscape of software development.
📸Outcome or Results
📝 Output Logs in Jenkins
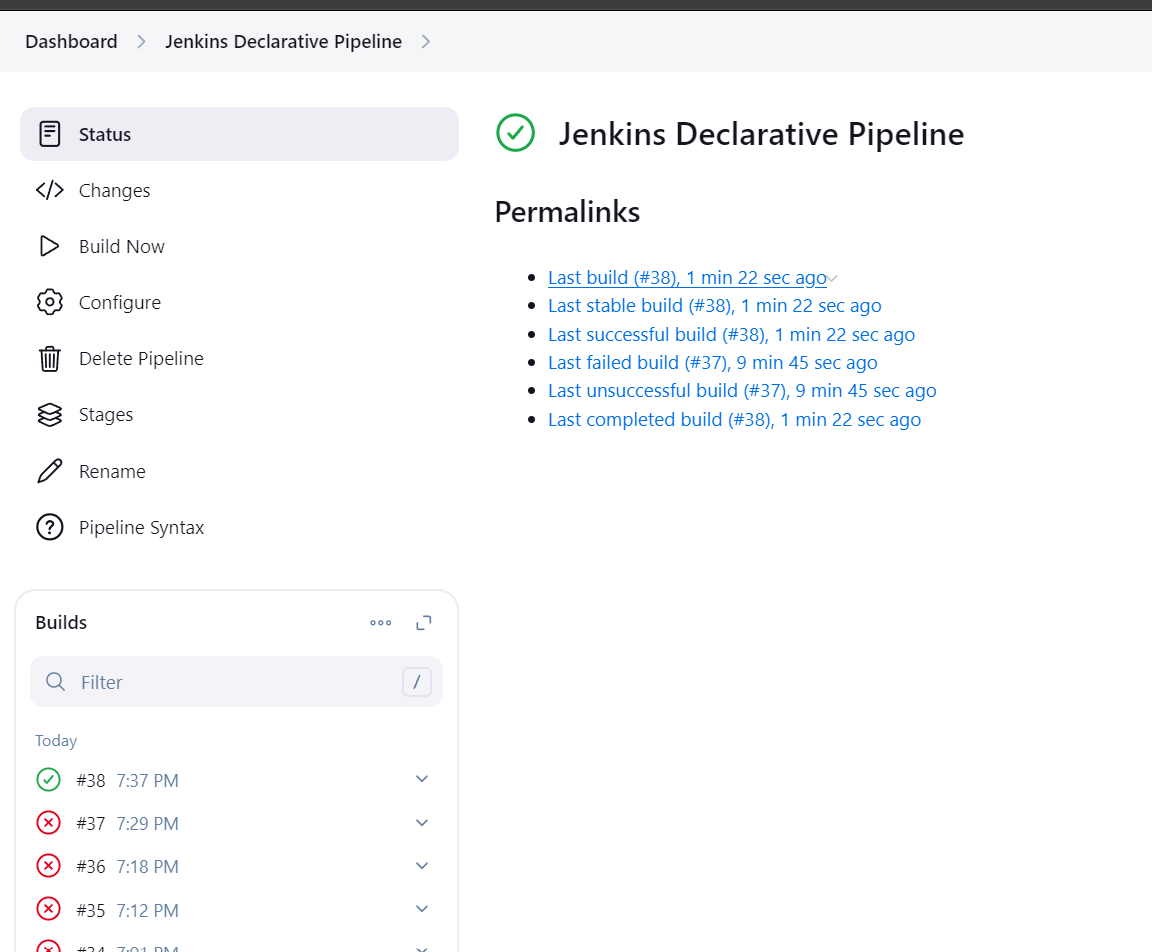
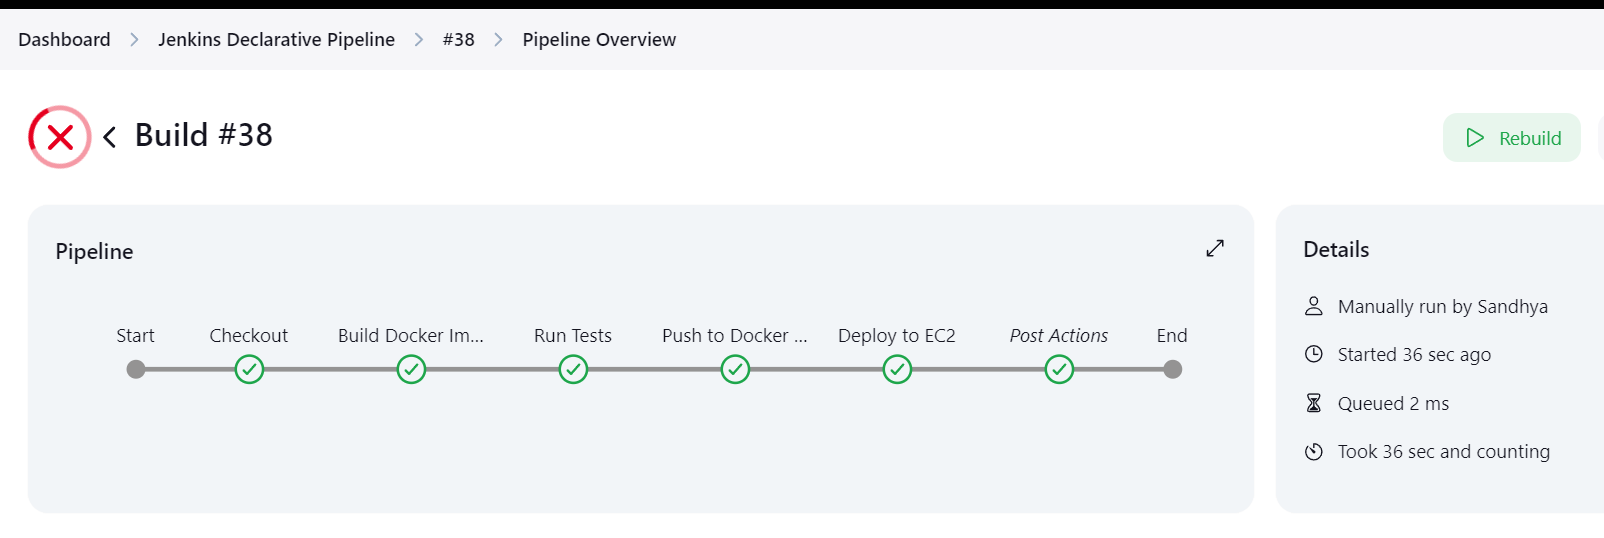
🐳 Docker Image Published to Docker Hub
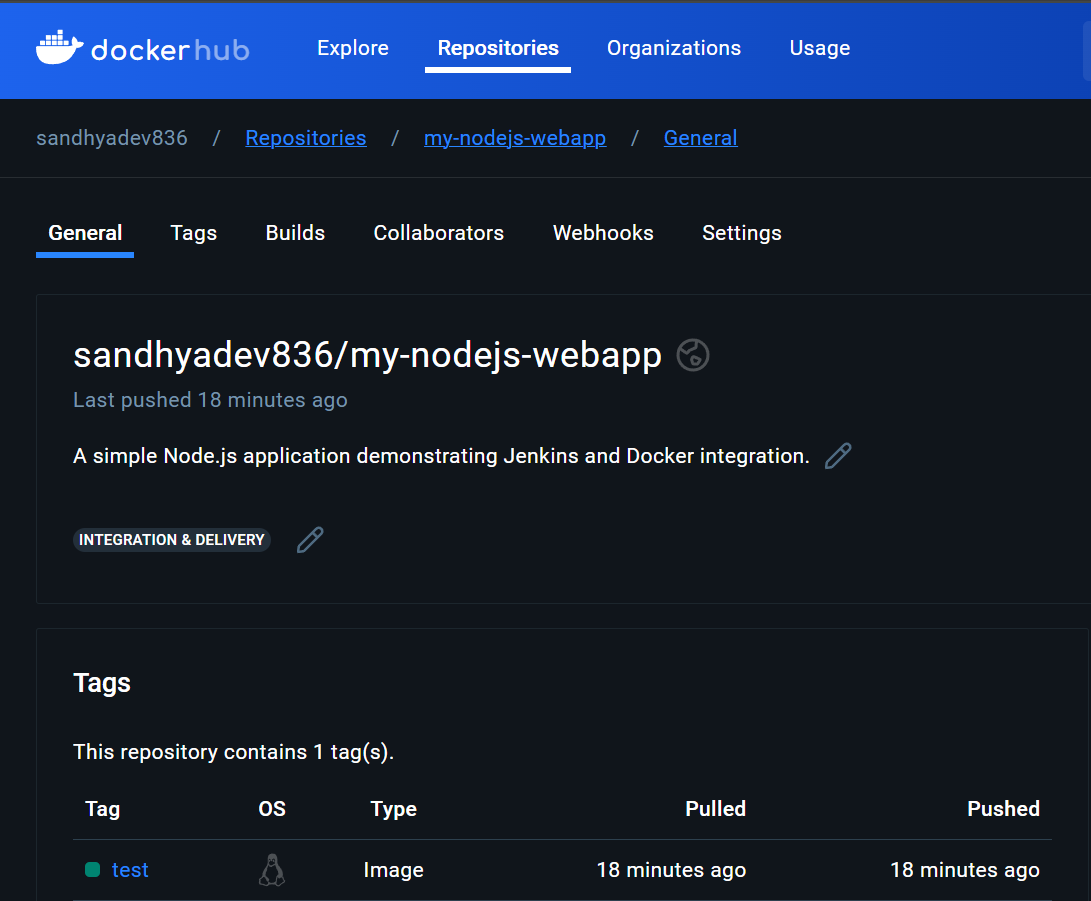
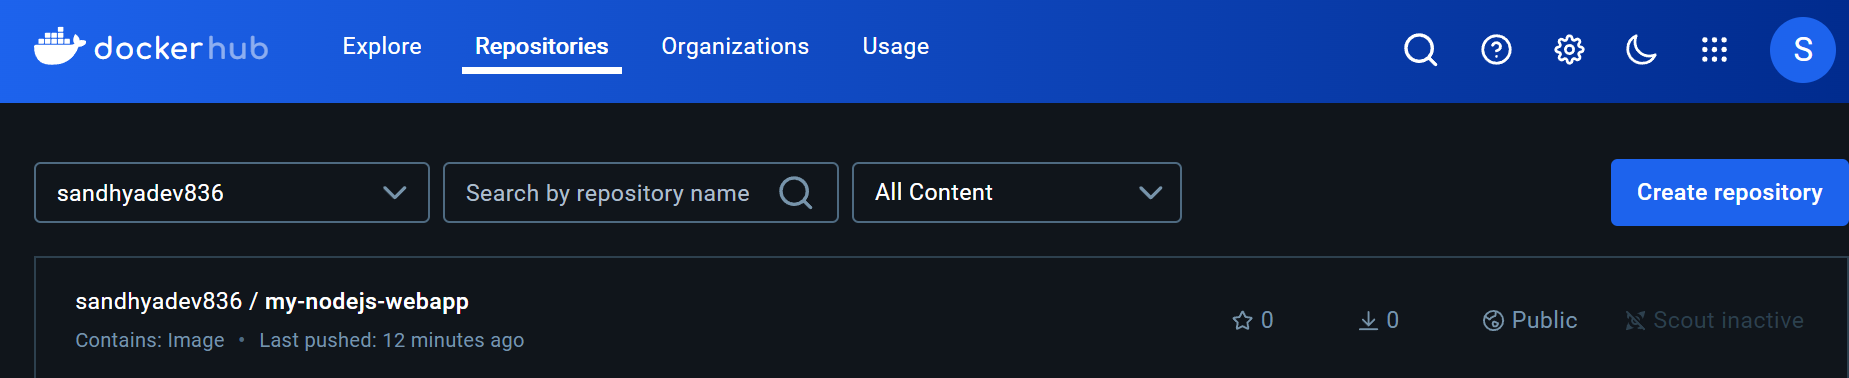
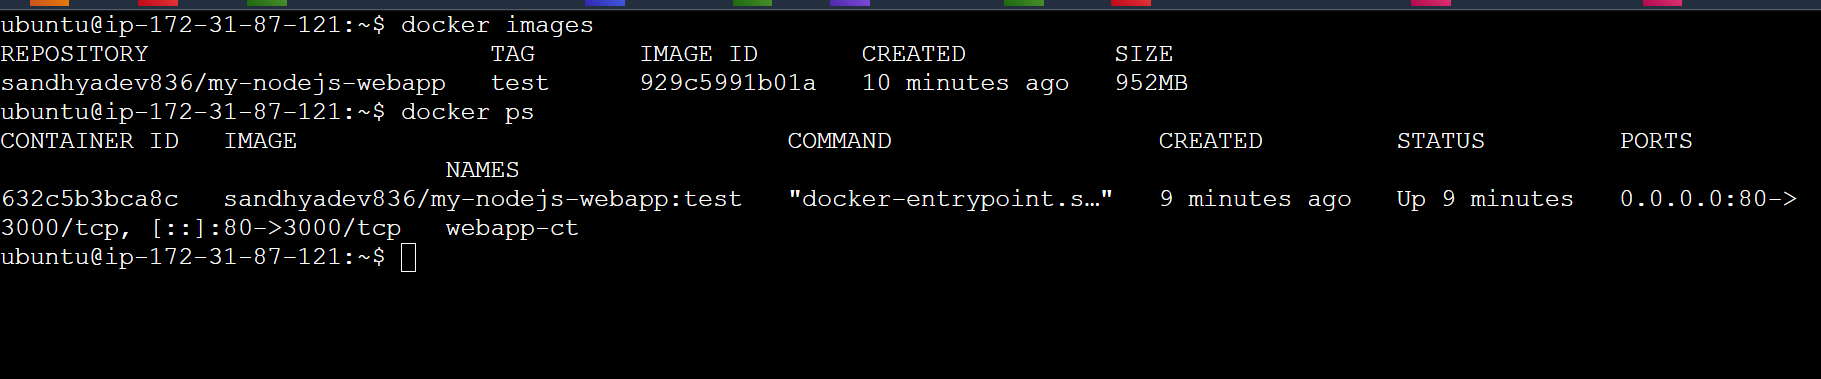
☁️A running container on EC2.
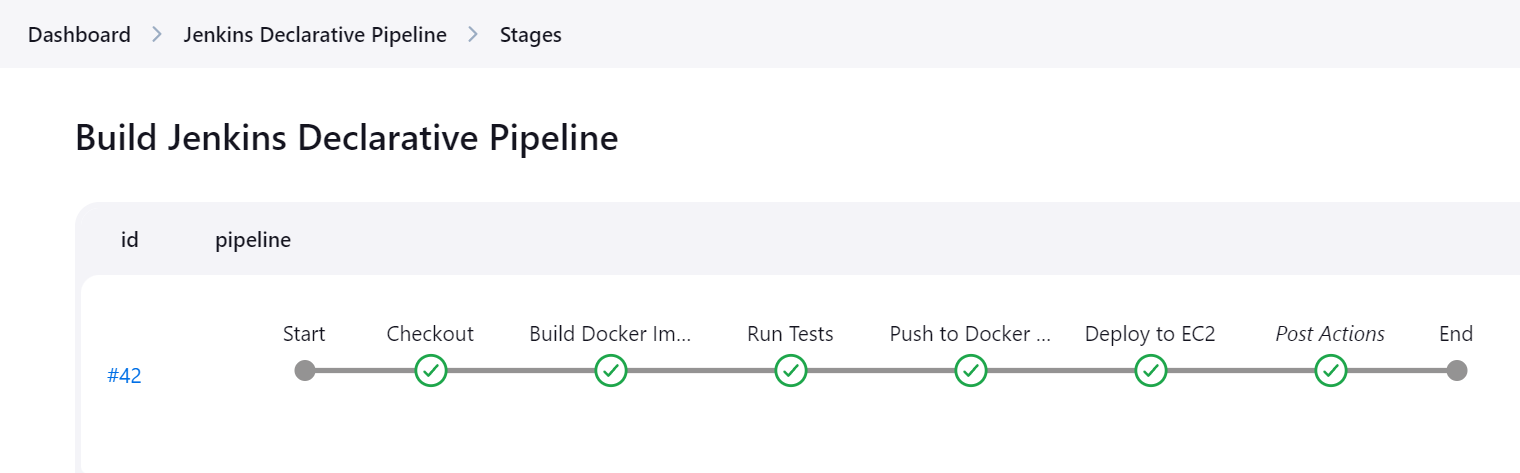
🔗Successful build triggered by the GitHub webhook
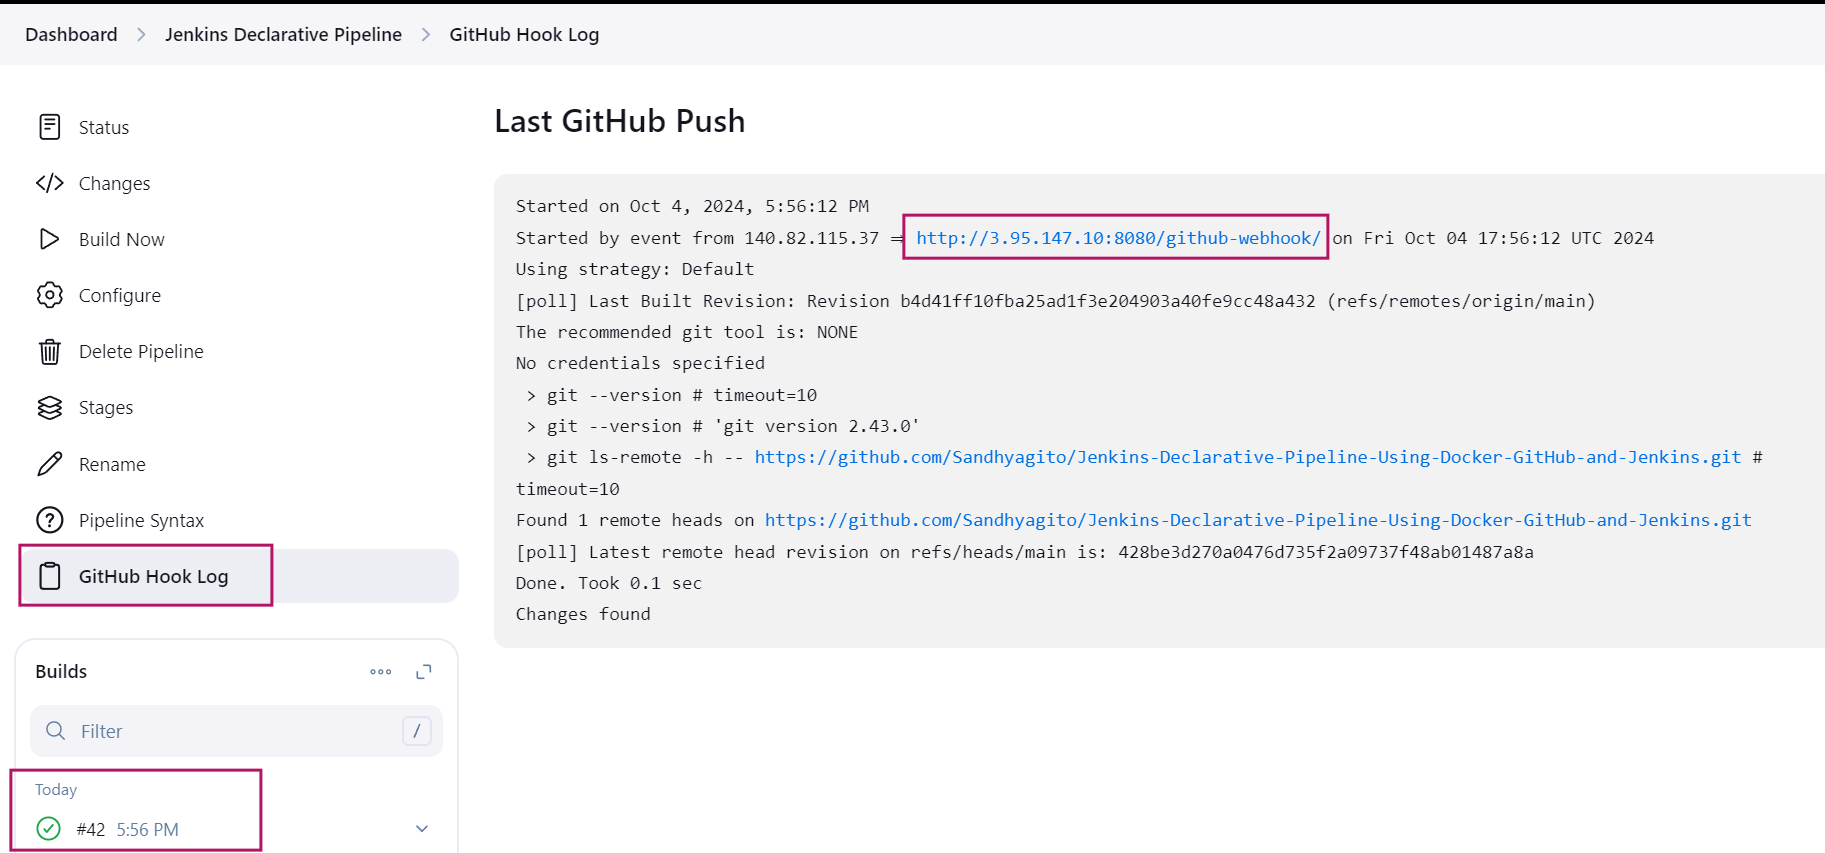
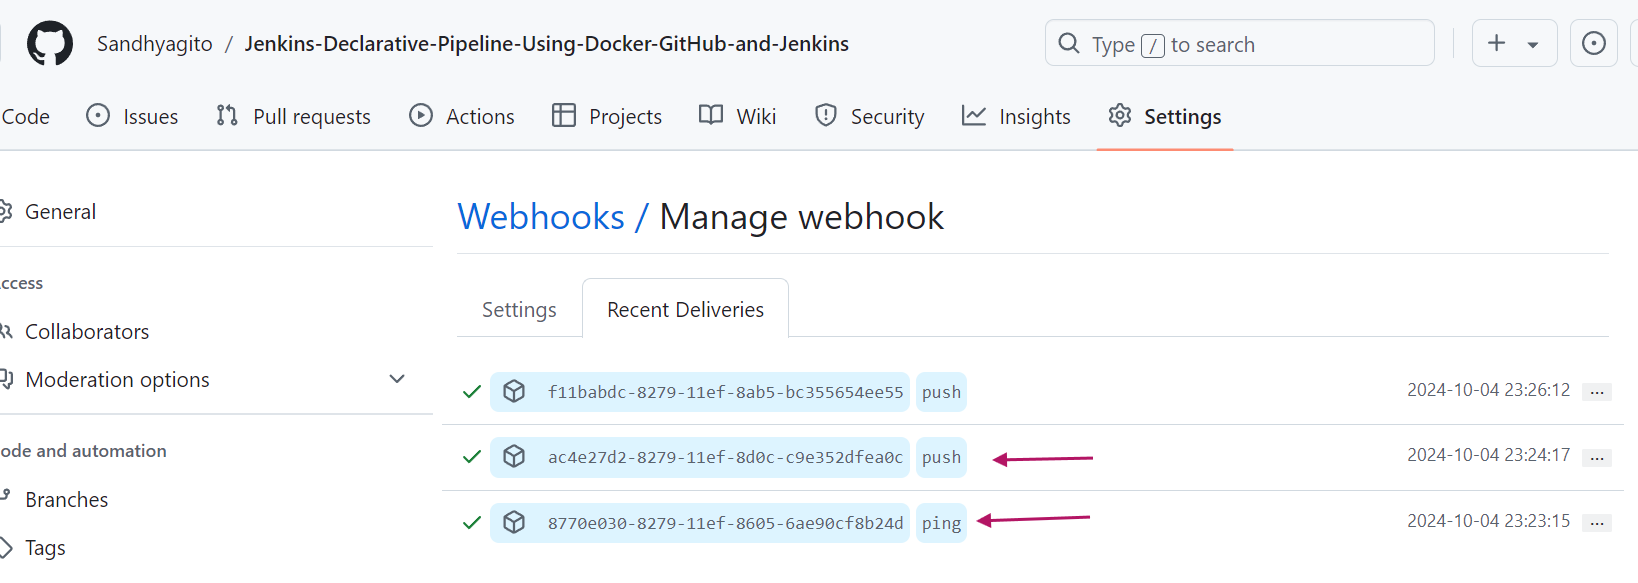
📬 Ping and Push Events in Webhook
The presence of both ping and push events in the recent deliveries indicates that the webhook is functioning correctly:
Webhook Functionality: The webhook is configured correctly as indicated by the successful ping event, which confirms that GitHub can reach the specified URL.
Automatic Triggering: The appearance of push events demonstrates that any changes made to the GitHub repository automatically trigger builds in Jenkins, showcasing the seamless integration.
Confirmation of Setup: The presence of both events in the webhook's recent deliveries signifies that the webhook is not only operational but also actively responding to changes in the repository.
⚠️ Potential Issues Faced
🔒 Permissions Errors:
Issue: Docker might not have permission to access certain files or directories.
Fix: Set the correct file permissions in the Dockerfile with:RUN chown -R node:node /usr/src/app🐋 Docker Build Failures:
Issue: The Docker build could fail due to problems in the Dockerfile or missing dependencies.
Fix: Check the Dockerfile for errors and ensure all dependencies are listed inpackage.json. Build the image with:docker build -t my-node-app .🔑 Environment Variable Issues:
Issue: Incorrect environment variables or missing credentials can cause failures when pushing images to Docker Hub.
Fix: Make sure the correct credentials are set in Jenkins by checking Manage Jenkins > Manage Credentials.🔐 SSH Connection Issues:
Issue: Unable to connect to your EC2 instance via SSH due to security group settings or key pair issues.
Fix: Ensure port 22 (for SSH) is allowed in your EC2 security group settings.📦 Docker Image Caching Problems:
Issue: Docker sometimes doesn’t rebuild layers properly, so your changes might not apply.
Fix: Force Docker to rebuild everything by using the--no-cacheoption:docker build --no-cache -t my-node-app .🔄 CI/CD Pipeline Failures:
Issue: The pipeline can fail at various stages due to any of the issues mentioned above.
Fix: Check the pipeline logs in Jenkins by going to the build's Console Output to see where it failed.⚙️ Misconfigured Docker Commands:
Issue: Incorrect commands in the Dockerfile or Jenkinsfile can stop the build.
Fix: Double-check commands likeCOPYin your Dockerfile. For example:COPY . /usr/src/app🛠️ Resource Limitations:
Issue: If your EC2 instance doesn’t have enough memory or CPU, it might slow down or crash.
Fix: Upgrade to a larger instance (liket2.smallort3.small) for better performance.📜 EOF Command Error
Issue:-bash: line 16: EOF: command not found
Place of Error: Jenkins Pipeline, in the Deploy to EC2 stage during SSH command execution.
Fix: Check the placement of theEOFand ensure proper formatting with no extra characters in the script.🐋 Docker Push Error
Issue:denied: requested access to the resource is denied
Fix: Double-check that Docker credentials in Jenkins are correct, and that the image tag (test) matches in both build and push stages.🔑 Docker Login Command Issue
Issue:bash: !MBJ+6!Y27mEM123: event not found
Fix: Surround the password with single quotes to handle special characters:docker login -u sandhyadev836 -p 'Xe!MBJ+6!Y27mEM123'

